Things to consider when changing kitchen doors
Changing your kitchen doors can be a great way to modernise your kitchen without the expense of starting all over again.
It is now extremely easy to get exactly the right replacement kitchen doors to suit the style of kitchen you are looking for. We've also seen the price of replacement kitchen doors drop dramatically. This has certainly not been at the cost of quality either, with the quality of door manufacturing improving all the time, and many suppliers now offering longer and longer guarantees. As an example, we now offer a 6 year warranty on all kitchen doors.
Can I Just Replace my Kitchen Doors?
Yes, replacing just your kitchen doors instead of ripping out the whole kitchen is very feasible to do.
While it can feel like a daunting task, replacing kitchen doors is a relatively simple process, especially if you are a competent and confident DIY-er (and no, those things aren't always the same thing!)
There are a few things to consider when replacing kitchen doors. We have outlined them in this article. It may seem long, but bear with us, it should cover everything you need and it isn't as daunting as it may feel at the beginning.
The first thing to choose is the style of door you are looking for. There is plenty of selection out there, so we would advise you to start by browsing Pinterest to see what style you like the most.
Choose Your Kitchen Doors Style
Choosing a door style is always a good staring place. Decide whether you want a modern style or a traditional kitchen, from there it should lead you naturally on to the colour and door style of the kitchen, whether that's a plain slab door, a shaker door, a J profile door, or something else completely.
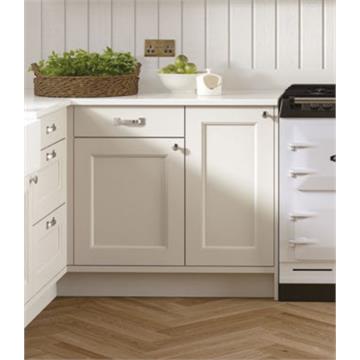
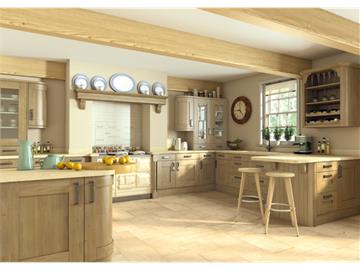
Traditional Kitchens
Traditional kitchens are normally more muted colours, creams, whites and wood colours. They are often more traditional designs, with shaker style doors being by far the most popular. These kitchen doors can be solid wood, but are often made up of MDF cut into the shape of a shaker kitchen, or in our case a 5 piece Shaker door. Still made of vinyl wrapped MDF, but made in five pieces to better represent the Shaker style.
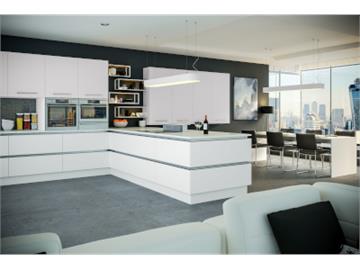
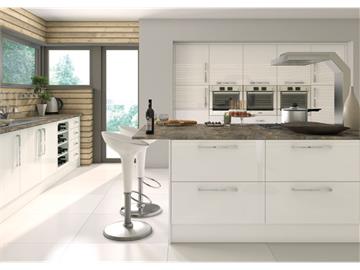
Modern Kitchens
Modern kitchens have typically come with gloss kitchen doors, often either plain slab doors (with the handle of your choosing) or integrated J Profile handled doors, where the handle is moulded into the door. They often come in fairly muted colours, with white and cream being the most popular, although grey gloss doors have become one of the mainstay of modern gloss kitchens in recent years.
In more recent years matt kitchen doors have come onto the market, and offer a really nice option for people who want a modern kitchen but don't want the gloss finish. These matt kitchen doors often come as either plain slab or J Profile kitchen doors, the choice is yours.

Measuring the doors
Once you've chosen your new door style, you will need to measure the doors. When looking at the measurements for replacement kitchen door it can seem daunting and confusing, but it is relatively simple once you've got the hang of it.
Door Size vs Cabinet Size
The key thing to understand when ordering doors is that the door on the cupboards are all slightly smaller than the cupboard/cabinets themselves. This is to ensure the doors don't rub against each other when you are opening and closing them.
Door manufacturers all refer to the doors in exact millimetres. As a result most kitchen door retailers do the same. While many door manufacturers use slightly different sizes, they are typically only 1mm different from each other, so will not make any difference when you fit the door.
As a guide, our doors are always 5mm shorter than the kitchen cabinets we sell. All our doors are 4mm narrower than our cabinet. As a result a 600mm base unit (the most popular kitchen cupboard by a long way) is 720mm high x 600mm wide (without the legs). The doors to go on a baseline 600mm cupboard (a base unit with one door and no drawers) would be a 715mm x 596mm door.
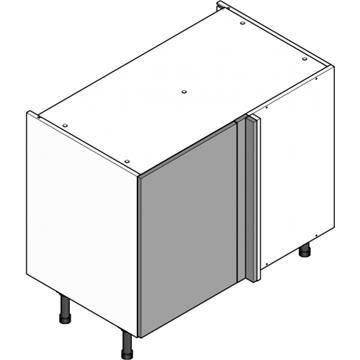
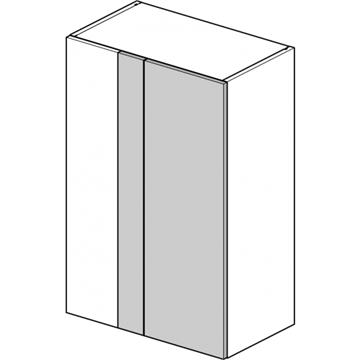
Doors and Drawers on one Cabinet
It can get a little more confusing when there are more than one door or drawer on one cabinet, however these are still usually set out in a standard way. We have outlined the typical layouts below. If in doubt, you should be able to measure your current drawer and door fronts to give you a starting guide.
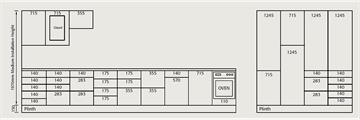
Cabinet Combinations
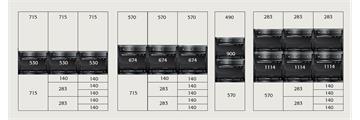
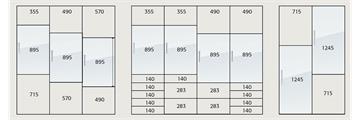
These combinations cover most situations. You will just need to work out the width of the units, and use the guides above to work out the door and drawer heights.
Integrated Appliances
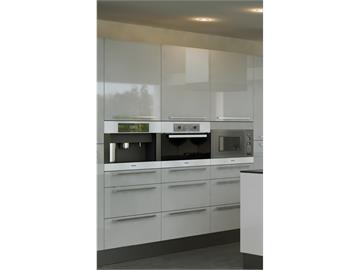
Many people take the opportunity to upgrade their appliances (fridges, freezers, dishwashers) at the same time as sprucing up their kitchen. Many go for integrated appliances, where the appliance sits either within a unit (like integrated ovens) or hidden behind doors (like integrated dishwashers).
There are three types of integrated appliances; ovens, fridge/ freezers, and dishwashers/washing machines.
Integrated Fridge, Freezers and Fridge/Freezer Combinations
Integrated fridges, freezers and combinations are appliances that are hidden behind doors. The appliance sits inside a 600mm wide unit. The matching kitchen doors are attached to the appliance doors with fixings. These fixings are supplied by the appliance manufacturer. Please note, you will still need hinges to fix the kitchen doors to the cabinets. These hinges are specific integrated appliance hinges and cannot be soft-close hinges, or your appliance door will not close properly.
As all fridge/freezer combinations have slightly different sized doors it is normal to fit the bottom shelf of the appliance housing to that when the appliance sits on the shelf, the top of the bottom appliance door lines up with the top of the bottom cabinet door, and the bottom of the top appliance door lines up with the bottom of the top cabinet door (sorry, difficult one to explain, so we hope that makes sense!).
Integrated Dishwashers/Washing Machines
Integrated dishwashers and washing machines are slightly different from the other units. They don't sit within a unit. They are always the same width as a standard unit. This means 600mm wide for a washing machine. There are two sizes for an integrated dishwasher. They are available as 450mm wide (slimline) and 600mm wide (standard) dishwashers.
You will need a standard door for integrated dishwashers and washing machines. You will need them undrilled, as the fixings will vary for every manufacturer and the drilling of kitchen doors refers specifically for use with a standard cabinet hinge. The door size for washing machines and standard dishwashers is 596mm (w) x 715mm (h). Door for slimline dishwashers will need to be 446mm (w) x 715mm (h).
Door Hinge Hole Position
The next element to consider is one of the most crucial part to get right, if you want to cut down on installation work. The drill holes for the hinges are a critical element of the door hanging. If you get this part wrong you will have to either re-drill the doors or re-position the fixing bracket to the cabinet, both of which are tedious, fiddly jobs, so please take a little longer on the preparation as it will pay off.
Each kitchen door will have two or three drill holes. Two is standard, but larger doors (typically on dressers and the larger door on a tall cupboard) will probably have three, to better support the weight of the door.
Manufacturers measure the position of the drill hole based on the position on the central point of the drill hole from either the top or bottom of the door (depending on whether it is a top or bottom drill hole). Central/middle drill holes are normally measured from the top of the door. As an example, we drill our holes at 98mm from the top and 98mm from the bottom of the door. We do this as our cabinets have the drill holes perfectly aligned for this as standard.
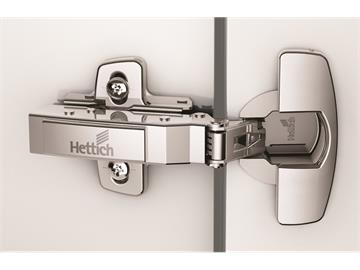
Door Hinges
This part is optional, but if we had our way it would be compulsory, so we urge you to please do this bit. If you do not currently have integrated soft-close hinges and drawers, please upgrade to them now. They server two main purposes.
They Feel Great
Soft close hinges are the easiest way to add a luxury touch to your kitchen. The way the door 'eases closed' instead of slamming gives a nice touch to any kitchen. While the old clip-on soft close additions were great at the time, the new integrated soft-close hinges and drawers are a real step up, and you won't regret upgrading if you don't have any soft close in your kitchen at the moment.
They Give Your Kitchen a Longer Life
Nothing makes us flinch quite like the slapping of a kitchen door against a kitchen cabinet, but just think of the effect it has on the kitchen! It puts added pressure and wear and tear on your door, cabinet and hinges, so upgrade now for a softer finish and a longer-lasting kitchen.
Make a List
Once you have all the doors measured and everything else in place it's time to put a shopping list together. List all the doors you need, along with hinges. Two per door, three for larger doors (check on your current doors to be sure). Don't forget the handles! Your doors won't be pre-drilled for the handles, as there are too many variations of sizes and positions, so you'll need to drill and fit these yourself, unless you're going for J Profile/integrated kitchen doors of course, in which case you can skip the handles.
Don't forget you are likely to need some other extras to finish your kitchen off properly. Here are a few you may need:
End panels; needed to match the end of any runs of units, where the side of a cabinet will be exposed - the cabinets are not usually matching the doors, but the end panels hide this, so it gives the kitchen the complete look.
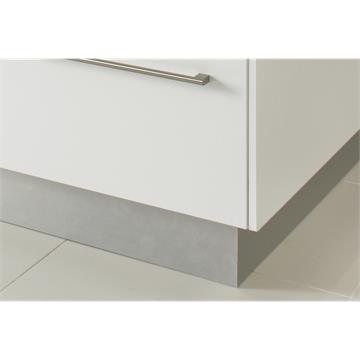
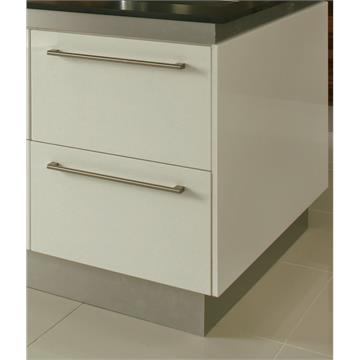
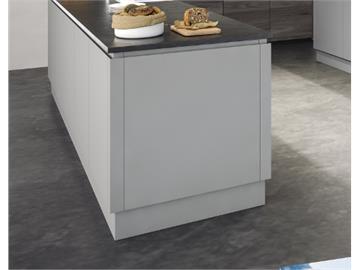
Plinths; also called kickboards, these are the piece of wood that goes under the units to hide the legs on the base units and tall/larder units. It is normal to use these as a complete 'run' across the legs of all the cabinets on one side of your kitchen. They typically come in lengths of between 2.8m and 3,1m long and can be cut down as required. Check the length and make sure you have enough before you start. If in doubt, buy extra.
Cornice and Pelmet; are the pieces that run along the top and bottom of the wall units. Traditionally you have used these on kitchens, and they are used to edge the wall units to give the 'complete look'. This is still the case on traditional looking kitchens, but have been largely replaced by multi-purpose rails in many instances, especially with modern kitchens. These can be used for both cornice and pelmet. They are plain, while traditional pelmet and cornice tends to be more decorative. Don't order a light pelmet or multi-purpose rail to go under wall cabinets if you are having a J Profile kitchen doors. You can't put a pelmet/rail under them, as you need access to the base of the door to grab the handle (you may still want to go for a cornice/rail above the wall units, it's down to personal preference.
Get Shopping!
Once you have the list together, you can order your replacement doors online. They will be with you in three to four days, so you won't have long until you get to the next part of your project.
Fitting
Fitting the doors is relatively straight-forward, especially if you've taken the time to do the preparation work, above correctly. It is a case of taking the current doors off the units - there is usually a clip to unclip the hinge from the hinge plate, and then the whole door will come away. You can then remove the hinge plate from the unit, if you're upgrading the hinges (the new hinges will come with plates) and replace them with the new hinge plates.
Screw the hinge to the new door. The hinge hole will be pre-drilled, but the two screw holes won't be, so line the holes up so that they are square with the side of the door and pre-drill the holes. You should then be able to screw the hinges into position.
Screw the handles at the door at this point too. Place the door on the floor and put the handle in position. You can play around with it, until you find the position that you are happy with, then you can mark and pre-drill the screw holes. Make sure you drill from the door front through to the back, and try your best to drill them squarely, or you will struggle to attach the handle to the door. If you can, but a jig for this, you can buy relatively cheap ones, and it makes the job much quicker and more accurate, especially if you have a lot of handles to fit.
You should then be able fit the door by clipping the hinges into the new hinge plate on the units. That's it. The new door is in position! Don't worry about squaring it up at this point. We would recommend fitting a run of doors at a time, then squaring them in one go.
Continue this process until the doors are all in place. At this point you can adjust all the doors to match. The hinges come with two adjustments. One will help square the doors up, so the gap between each door is even (by adjusting the hinge left and right from the cabinet). The other will help you adjust the space between the door and the cabinet (how close the door sits to the cabinet).
Final touches
Once the doors are in place, there's just the finishing touches to complete. Put the plinth in place, end panels and cornice and pelmets. This part does take a while, but don't scrim on it, it's worth the effort. These are the finishing touches you will be looking at for years to come!
We hope that has given you an insight in what you need to do to replace your kitchen doors. If you have any questions, or think we've missed anything out please don't hesitate to get in touch with us on 02920 007 948.